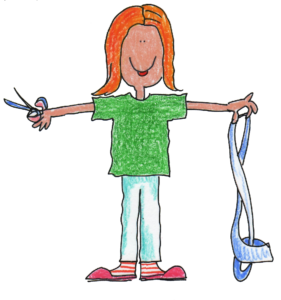
Kids can try it at home with scrap paper, scissors, and tape. It’s very adaptable for different ages and abilities.
Watch the video to see what happens. Try it yourself.
Keep track of the number of twists before you tape the paper to find the pattern for how many twists results in how many loops.
It’s fascinating for both children and grownups!Â
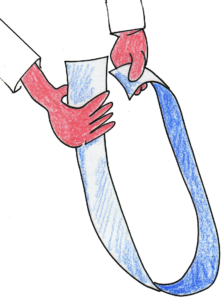
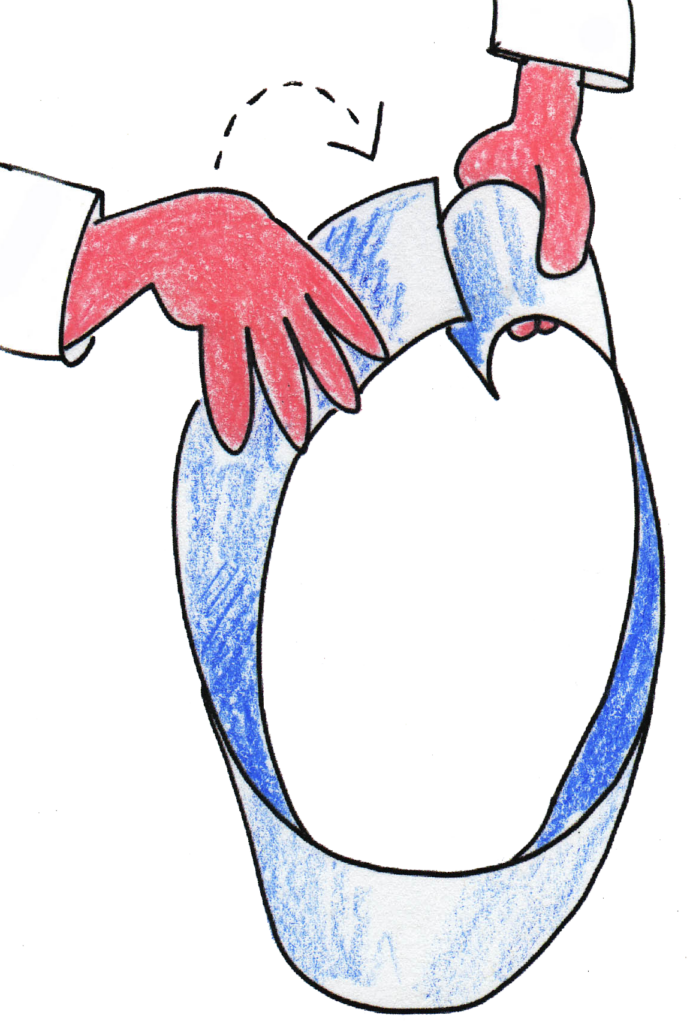
NO TWISTUse one strip of narrow paper like adding machine tape to make a loop by simply bringing the ends together and taping the ends of the paper securely. Predict what will happen if the paper is cut in half lengthwise. Two narrow loops? Cut it in half lengthwise. Watch the first twenty seconds of the video and then stop if you don’t want to see the results before you cut your paper. * |

ONE TWISTMake a loop with a second strip of paper. Just before taping the ends securely, add one twist to the paper, creating a Möbius strip. Predict the results when you cut it in half lengthwise. Two loops? One loop? Cut it in half lengthwise. Watch the first twenty-five seconds of the video and then stop if you don’t want to see the results before you cut your paper. ** |
|
 |
MANY TWISTSPredict what might result if the paper is twisted two, three, or four times? Try each variation and see if there is a pattern to the number of twists and the number of loops. Can you make a chart of the pattern? Many of the reactions in science are predictable once a pattern is found. |
 |
TWO LOOPSInsert one strip of paper inside a loop and tape to create two connected loops. Securely tape them together from both sides and on the top and bottom of each loop where they overlap (1). What will the paper will look like when the loops are cut in half lengthwise? |
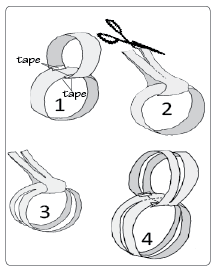 |
Gently flatten one loop and cut through both layers toward the end that is taped (2). Turn and gently flatten the second loop and cut through it (3) so that both loops are nearly cut in half. Continue to cut through the taped sections of each loops. The cut loops form a very surprising shape!
|
WHAT’S GOING ON?
There is only one side to the strip when it is twisted one time. You can prove this by drawing a line starting on one side and when you are finished, you will be back where you started. There are two sides to the strip if it is twisted an even number of times. You can prove this the same way. Draw a line and you will get to the beginning point without having drawn over the whole loop. You will have to start again on the other side of the loop in order to have a line on both sides of the strip.
*Â you will see two separate loops of paper
** you will see one loop of paper